Introduction
The Pimped Apache status has a command line tool.
It was written to be used for manipulating the config settings in automated installations
(Ansible, Puppet or others) and in scripts.
It is located in the ./bin/ subdirectory.
With it you can ...
- list default settings
- create/ read/ update/ delete custom values of all program settings
- create/ read/ update/ delete groups and servers
The response is mostly an array and is shown in JSON syntax.
Additionally there are some lines starting with ";" (semikolon). Those are written to stderr.
on *NIX systems:
config.php [parameters ...] 2>/dev/null
or on MS Windows:
php config.php [parameters ...] 2>NUL
To beautify or filter the JSON output you can pipe it to "jq".
php config.php [parameters ...] | jq
The exitcodes are typically ...
- 0 (zero) - if the command was successful
- non zero - if an error occured.
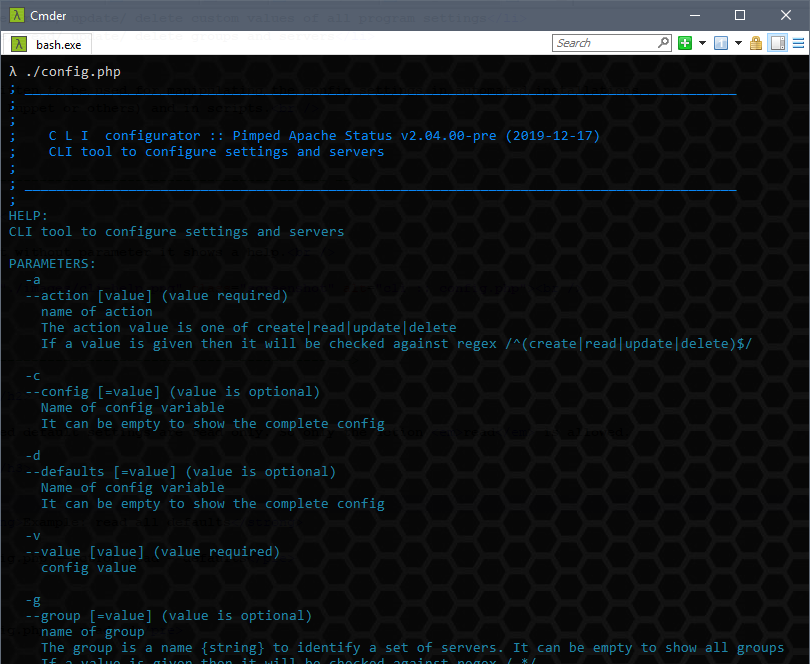
Show help
Calling it without parameter it shows a help.
Handle default settings
The shipped default settings are read only. So only the action read is allowed.
You will need this to read the valid names of the default config keys to add them as custom values.
See the next chapter.
Next to the action you need to add the parameter --defaults (or -d) to identify
the type of data to handle. This is an parameter with optional value.
--defaults (without value) addresses all values.
--defaults=[varname] addresses a given value (subitem) to show.
Read defaults
read all default values
config.php --action read --defaults
or
config.php -a read -d
The response is an array and is shown in JSON syntax.
; C L I  configurator :: Pimped Apache Status
; read all default settings:
{
    "auth": {
        "user": "admin",
        "password": false
    },
    "autoreload": [
        false,
        10,
        30,
        60,
        300
    ],
    "checkupdate": 86400,
    "datatableOptions": {
        "bPaginate": false,
        "bLengthChange": false,
        "bFilter": true,
        "bSort": true,
        "bAutoWidth": false,
        "bStateSave": true,
        "sPaginationType": "full_numbers",
        "oLanguage": "__LANG__"
    },
    (...)
}
read a given default variable
Add a valid config key name behind --defaults=(...).
Example:
Get selectLang - it contains the selectable frontend languages of the web gui as an array.
config.php --action read --defaults='selectLang'
or
config.php -a read -d='selectLang'
; C L I  configurator :: Pimped Apache Status
; read default settings [selectLang]:
[
    "en",
    "de"
]
; DESCRIPTION of [selectLang]:
; Selectable languages
Notice:
The config keys are case sensitive.
If you enter a wrong key you get an error message:
ERROR: a varname [your-entered-name] does not exist in the config.
Example:
Get lang - it contains the current frontend language of the web gui as a string.
config.php --action read --defaults='lang'
or
config.php -a read -d='lang'
; C L I  configurator :: Pimped Apache Status
; read default settings [lang]:
"en"
; DESCRIPTION of [lang]:
; Currently active default language
Create, update, delete defaults
The shipped default settings are read only. Other actions than read are NOT ALLOWED.
You will get an error message.
config.php -a delete -d='whatever'
; C L I  configurator :: Pimped Apache Status
ERROR: Wrong action. Default values are read only but you can override them by using a custom setting.
 --action add --config=whatever
Handle custom settings
The shipped default settings are read only. To override them there is an additional config
that holds the overrides of each wanted setting.
The custom settings contain those overrides.
You will need this to read the valid names of the default config keys to add them as custom values.
See the previous chapter.
Next to the action you need to add the parameter --config (or -c) to identify
the type of data to handle. This is an parameter with optional value.
--config (without value) addresses all values.
--config=[varname] addresses a given (sub)item.
--value [value of the item] sets a value (in the actions create and update).
Create custom item
The basic syntax is
config.php --action create --config=[varname] --value [...]
or
config.php -a create -c=[varname] -v [...]
Notice:
- As varname you need to know the correct config key. Fetch it by reading the default settings.
- You can create custom items only if the default config key exists too. Otherwise you get an error for a unknown key.
- You can create a custom item only if it does not exist yet. For existing custom values you need to use the action update
- Behind value set an integer or string. If you change an array value then use JSON syntax to describe the data.
Example: set frontend language to German with adding key lang and the string "de" as value
config.php --action create --config=lang --value de
or
config.php -a create -c=lang -v de
; C L I  configurator :: Pimped Apache Status
; create custom var [lang]:
; default: "en"
; your value: "de"
OK
; DESCRIPTION of [lang]:
; Currently active default language
Read custom settings
read all existing custom values
config.php --action read --config
or
config.php -a read -c
The response is an array and is shown in JSON syntax.
; C L I  configurator :: Pimped Apache Status
; read all custom settings:
{
    ...
}
read a given custom variable
Add a valid config key name behind --config=(...).
Example:
Get lang - it contains the current frontend language of the web gui as a string.
config.php --action read --config='lang'
or
config.php -a read -c='lang'
; C L I  configurator :: Pimped Apache Status
; read custom settings [lang]:
"de"
; DESCRIPTION of [lang]:
; Currently active default language
Update custom item
The syntax of the update action is similiar to the create action.
config.php --action update --config=[varname] --value [new value]
or
config.php -a update -c=[varname] -v [new value]
Example: Update lang - with language key "de".
config.php --action update --config=lang --value de
; C L I  configurator :: Pimped Apache Status
; update custom var [lang]:
; current custom value: "de"
; new value: "de"
OK
; DESCRIPTION of [lang]:
; Currently active default language
Notice:
- As varname you need to know the correct config key. Fetch it by reading all custom settings.
- You can update custom items only if it already exists: it must be created first.
Delete custom item
With deleting a custom config setting you remove the override value. The program then
will use the default value.
The basic syntax is
config.php --action delete --config=[varname]
or
config.php -a delete -c=[varname]
Notice:
- As varname you need to know the correct config key. Fetch it by reading all custom settings.
- You can delete custom items only if it already exists.
Handle groups and servers
You can create groups and add servers there. So you can watch a loadbalances website
or all servers of a project.
As minimum there must be 1 group.
Below each group you can add as many servers you want.
--+-- group-1
  |    |
  |    +-- server-1-1
  |    |    |
  |    |    +-- settings of server-1-1
  |    |
  |    +-- server-1-2
  |         |
  |         +-- settings of server-1-2
  :
  +-- group-N
       |
       +-- server-N-1
       |    |
       |    +-- settings of server-N-1
       :
       +-- server-N-M
            |
            +-- settings of server-N-M
Next to the action you need to add the parameter --group (or -g) to identify
a group. This is an parameter with optional value.
--group (without value) addresses all servers.
--group=[name] addresses a given group.
--server [hostname] addresses a hostname below a group (--group=[name]).
Create
Create a new group
The basic syntax is
config.php --action create --group=[name]
or
config.php -a create -g=[name]
Example: let's create a group for a loadbalanced webseite named lb-website...
config.php --action create --group='lb-website'
; C L I  configurator :: Pimped Apache Status
; create group [lb-website]:
{
    "result": true
}
Notice:
- You can create a group only if it does not exist yet.
Create a new server
The basic syntax is
config.php --action create --group=[name] --server [hostname] --status-url [url] --userpwd [user:password]
or
config.php -a create -g=[name] -s [hostname] -u [url] -p [user:password]
Notice:
- You can create a server only if it does not exist yet. For existing server data you need to use the action update
Example: add a new server serverA and serverB with a server-status-url...
config.php --action create --group='lb-website' --server serverA --status-url https://server-a/server-status
; C L I  configurator :: Pimped Apache Status
; create server [lb-website] -> [serverA]:
; host data: {"group":"lb-website","label":"serverA","status-url":"https:\/\/server-a\/server-status","userpwd":false}
{
    "result": true
}
... and as 2nd command
config.php --action create --group='lb-website' --server serverB --status-url https://server-b/server-status
; C L I  configurator :: Pimped Apache Status
; create server [lb-website] -> [serverB]:
; host data: {"group":"lb-website","label":"serverB","status-url":"https:\/\/server-b\/server-status","userpwd":false}
{
    "result": true
}
Read
read all existing groups
config.php --action read --group
or
config.php -a read -g
The response is an array and is shown in JSON syntax.
; C L I  configurator :: Pimped Apache Status
; read existing groups:
[
    "lb-website",
    "my default environment"
]
read a given group
Add a valid group name behind --group=(...).
Example:
Read the group lb-website.
config.php --action read --group='lb-website'
or
config.php -a read -g='lb-website'
; C L I  configurator :: Pimped Apache Status
; read servernames of group [lb-website]:
[
    "serverA",
    "serverB"
]
; Hint: use as additional param --server '[NAME]' to show its settings.
read server settings
Next to the group you need to add a server name.
The basic syntax is
config.php --action create --group=[name] --server [hostname]
or
config.php -a create -g=[name] -s [hostname]
Example: Show the server serverA of group lb-website.
config.php --action read --group='lb-website' --server serverA
or
config.php -a read -g='lb-website' -s serverA
; C L I  configurator :: Pimped Apache Status
; read server [lb-website] -> [serverA]:
{
    "label": "serverA",
    "status-url": "http:\/\/serverA\/server-status",
    "userpwd": ""
}
Update
Rename group
For renaming use --newname to set a new name.
The basic syntax is
config.php --action update --group=[name] --newname [new group name]
or
config.php -a update -g=[name] -n [new group name]
The group name must exist.
The new group name must NOT exist.
Rename server
For renaming use --newname to set a new name.
The basic syntax is
config.php --action update --group=[name] --server [hostname] --newname [new hostname]
or
config.php -a update -g=[name] -s [hostname] -n [new hostname]
The group -> hostname must exist.
The new hostname must NOT exist.
Update server data
The syntax of the update action is similiar to the create action.
--status-url sets a new server status url
--userpwd sets a new user and password for basic authentication
If you do not use --status-url or --userpwd then its value will be updated to false.
config.php --action update --group=[name] --server [hostname] --status-url [url] --userpwd [user:password]
or
config.php -a update -g=[name] -s [hostname] -u [url] -p [user:password]
Example: Update status-url - with adding ".local" next to the hostname
config.php --action update --group='lb-website' --server serverA --status-url https://server-a.local /server-status
; C L I  configurator :: Pimped Apache Status
; update server [lb-website] -> [serverA]:
; host data: {"group":"lb-website","oldlabel":"serverA","label":"serverA","status-url":"https:\/\/server-a.local\/server-status","userpwd":false}
{
    "result": true
}
Notice:
- As varname you need to know the correct config key. Fetch it by reading all custom settings.
- You can update custom items only if it already exists: it must be created first.
Delete
The basic syntax is
config.php --delete --group=[name] [--server [hostname]]
or
config.php -a create -g=[name] [-s [hostname]]
Delete a server
To delete a server from a group follow the basic syntax and set a group AND a hostname.
Example: Delete serverB from group lb-website
config.php --action delete --group='lb-website' --server serverB
; C L I  configurator :: Pimped Apache Status
; delete server [lb-website] -> [serverB]:
{
    "result": true
}
Delete a group
To delete a group set the group name only without a server.
config.php --delete --group=[name]
or
config.php -a create -g=[name]
WARNING: This command will delete a group even if it contains servers.